
Tiling might seem like a straightforward job — spread some glue, press down the tiles, add grout, and you’re done. But as any seasoned renovator or tiler will tell you, doing it right takes more than a steady hand. Using the correct tiling method isn’t just about looks — it’s about longevity, safety, and preventing costly mistakes down the track.
Whether you’re refreshing your bathroom, installing a kitchen splashback, or redoing your outdoor patio, this blog covers why proper tiling technique matters — and how it can save you time, money, and stress.
🔨 Tiling is More Than Just Laying Tiles
At first glance, tiling may seem easy. But behind a flawless finish are steps that must be done properly — surface preparation, correct adhesive selection, layout planning, spacing, levelling, and sealing. Skipping any of these could lead to cracked tiles, loose grout, water damage, or even tile failure.
🧱 Common DIY Tiling Mistakes (and How to Avoid Them)
Here are a few of the most common pitfalls we see from first-time tilers:
1. Poor Surface Preparation
Tiles require a clean, dry, level surface. Applying tiles over uneven or dirty substrates results in tiles that shift, pop up, or crack.
✅ Always use a self-levelling compound where needed and ensure surfaces are clean and primed.
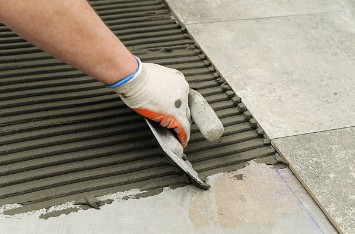
2. Using the Wrong Adhesive
Not all tile adhesives are the same. Using mastic in a wet area or on the floor? That’s a recipe for tile lift or water damage. Outdoor tiling with indoor glue? Your tiles may not last the season. Learn more about proper tile adhesive classifications here
✅ The correct adhesive depends on tile type, surface, moisture exposure, and flexibility needs.
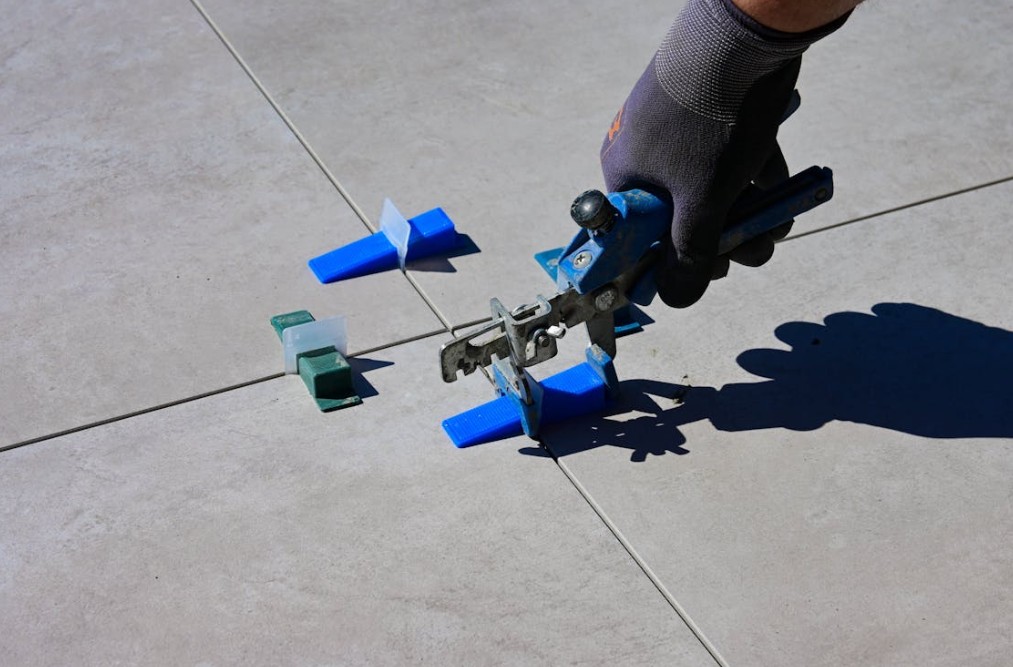
3. Skipping Levelling Systems
Uneven tile edges (called “lippage”) not only look bad — they’re also a tripping hazard and a grout nightmare. Levelling clips ensure tiles sit flush with each other, especially for large-format tiles.
✅ A levelling clip and wedge system keeps your tiles flat and evenly spaced during installation.
4. Poor Layout Planning
Starting without measuring or dry-laying your tiles can lead to awkward cuts in corners or uneven symmetry.
✅ Always find the centre of your space and plan tile placement before applying adhesive.
📏 Why Method Matters: Function, Finish, and Durability
Correct technique ensures:
Strong tile adhesion
Waterproof integrity in wet areas – “For compliance in wet areas like bathrooms or laundries,
always refer to the to ensure your membrane meets Australian requirements.” There is a new code for compliance see herePerfectly straight lines and symmetrical layouts
Smooth, flush surfaces with no trip hazards
Long-lasting results that don’t crack, lift, or leak
In short — doing it right the first time means fewer repairs and a professional finish that adds value to your home.
📘 Want to Tile Like a Pro? Download Our FREE Step-by-Step Guide
We’ve created an easy-to-follow guide to help homeowners and DIYers tile confidently and correctly — even if you’ve never laid a tile before.
🎁 Inside the Free Guide:
Full list of tools and materials you’ll need
Step-by-step instructions for each stage (prep, layout, cutting, grouting)
Advice on choosing the right adhesive (mastic, cement, flexible, rubber-modified) see here
Tile pattern inspiration with visual diagrams
Pro tips for using levelling clips, laser lines, and avoiding lippage
BONUS: Get a $20 voucher for your next purchase from Builders Warehouse Online
Enter details below to receive for youre FREE guide.
💬 Final Word
Tiling can be a DIY-friendly project — but only if you use the correct techniques, tools, and adhesives. The difference between a rushed job and a professional finish is in the planning, prep, and process.
Ready to take on your next tiling project with confidence? Grab our free guide and make your next DIY project one you’ll be proud of.